webviewer-ext
Thunkable Web Viewer/JS Web Bridges Extensions
Send a message between your Thunkable app and your website in a Web Viewer. It is highly recommended to do all of this within a module.
Examples
Picker
Project Link: click here
The module is called Picker and is within the project above. You can see the inside of the module if you do “See inside” if you hover the 3 dots of the module. The code for Picker is in this GitHub under examples called “picker.html”.
Setup
In the <head> tag of your website, include the script tag below
<script src="https://thunkable.github.io/webviewer-extension/thunkableWebviewerExtension.js" type="text/javascript"></script>
Send a message from Thunkable to your website
Use these blocks to send a message to your website

On your website, receive the message using the code below:
// when we get a message from the app, display it on the page
ThunkableWebviewerExtension.receiveMessage(function(message) {
  // Do something with your message
  alert(message)
});
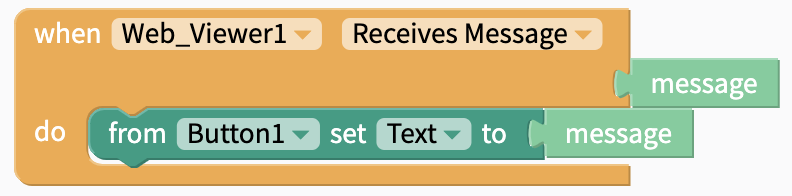
Send a message from your website to Thunkable
Use these blocks to receive a message from your website
On your website, send a message using the code below:
ThunkableWebviewerExtension.postMessage('hello world');
Transmitting large amounts of information back and forth
Only strings and JSONs are able to be transferred back and forth between Thunkable blocks and code.
To send a massive amount of information from Thunkable to code, it is recommended to create an object, turn it into a JSON, and then pass that in as the message.
There is an example below. While the data can be structured in multiple ways, it is recommended to have a key that dictates what function is called in the code. In this example, I am using “type”.
In the code, to access the data, first parse the message. Then any of the values passed through can be accessed by msgFromApp.NAMEOFKEY
Running a function on screen start/open
The web viewer runs the code after the screen opens in Thunkable, so any functions won’t work if it require external information. The best way to have the web viewer run a function or some code when it is first available is by using the following combinations.
By having the following code in the script, once the web viewer starts and starts executing all the code, it will send an message to Thunkable.
In Thunkable, you can then capture exactly when the message is sent. This will give you an indication of when the web viewer is ready to operate.